Free Websites - Main Help Page
Website Overview - The User Admin Menu
The 1st thing you do to manage your site is to click the 'Gray Box' on the site's main page screen.
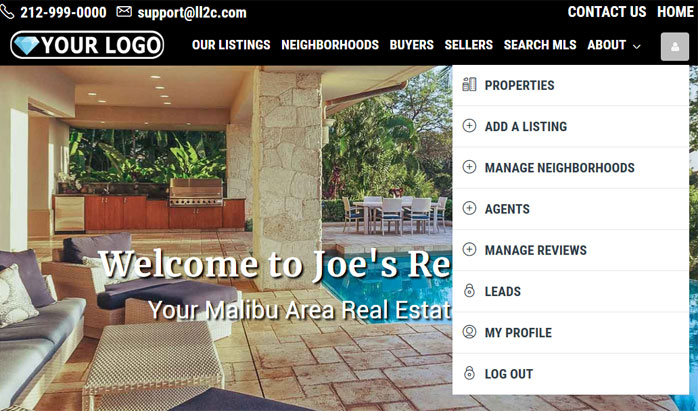
To make changes on your website, 1st login to Openhousewiz.com and then you can access your site to make changes. Once logged in there is a gray square icon on the upper right of the website. That is the admin menu. From there you can do pretty much anything on the site such as Add Agents, Properties, Reviews and more.
Help & How-To Sections
|
||
| Add / Edit Agents | Add / Edit Properties or Listings | Add / Edit Reviews |
| Add / Edit Neighborhoods or Areas | Add or Remove items from the Menu | Edit the About Us page |
| Edit the Buyers page | Edit the Sellers page | Edit the Contact Us page |
| Domain Setup | Landing Pages | |
[sp_easyaccordion id="27679"]
Add / Edit Agents
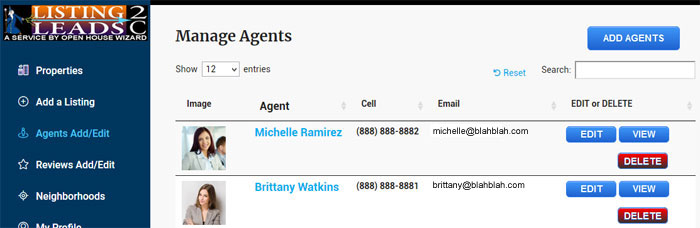
From the Agents link you can Add, Edit and Delete Agents.

Click for a 'Show Me How' Walkthrough.
Add / Edit Properties or Listings
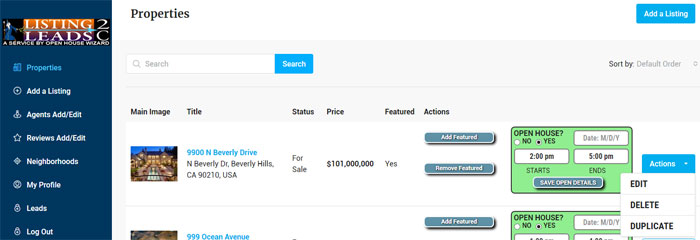
From the Properties Link you can Add, Edit or Delete Properties or Listings. You can also set a property as 'Featured' or Add an Open House Date. To add an Open, click 'Yes' on the Open House question as seen above, fill in the data and time and Save Open Details. This will add an Open House label to the property and the Open House info will display on that Property's page. This can be useful for sending the Property's link to invite clients to the open or to use the page as a single property website.
You can Edit or Delete a property using the menu on the right.

Click for a 'Show Me How' Walkthrough.
Add / Edit Reviews
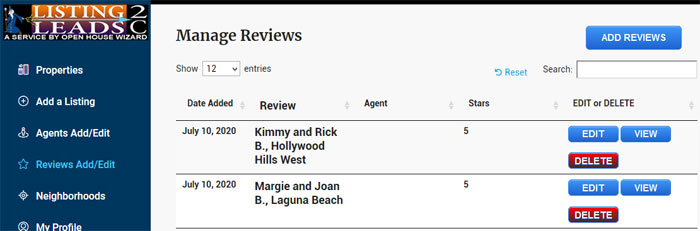
The reviews link will allow you to Add, Edit or Delete reviews. You can also assign or link the reviews to specific agent or agents.

Click for a 'Show Me How' Walkthrough.
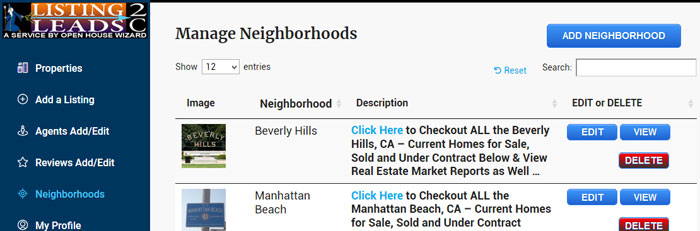
Add / Edit Neighborhoods or Areas

Click for a 'Show Me How' Walkthrough.
Add or Remove items from the Menu
To add or remove items from the main menu that shows at the top of the screen we need to access Wordpress menu options. It is beyond the scope of our support to get into too much detail on how Wordpress works but we wanted to include how to edit the menu since that is fairly important. Some of you may already be up to speed on Wordpress so you probably don't even have to read this in that case!
To edit the menu, add '/wp-admin/nav-menus.php' after your site name in the browser url bar at the top of your browser page. So if your site name is: https://mysite.ll2c.com, then after adding it in the browser it would read:
https://mysite.ll2c.com/wp-admin/nav-menus.php
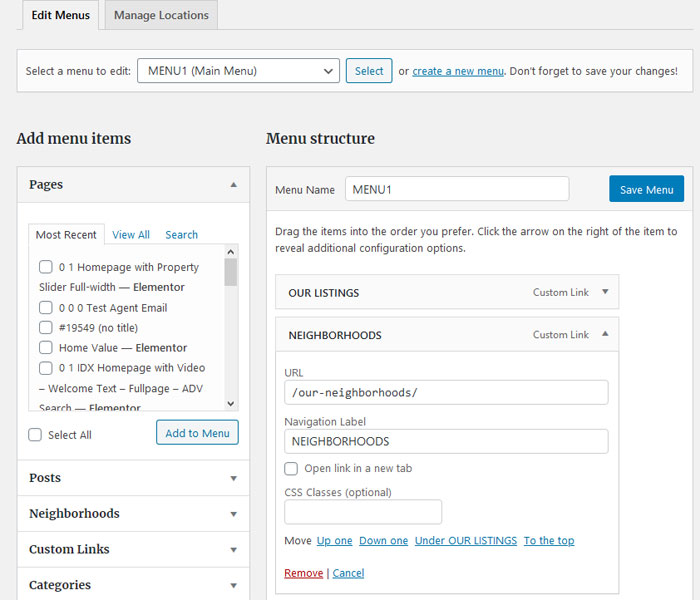
Hit enter to load the Wordpress menu editor for your site. You will see a screen similar to the one above. We selected MENU1 which is the main menu to edit. So for example if you would like to rename the 'Neighborhoods' menu item to Areas, click to the right of the Neighborhood menu item where is says 'custom link' and it will show that menu item's properties. To rename it you would enter the new name where it says 'Navigation Label'.
When finished click 'Save Menu'. You can also remove the item from the same properties view as shown above. The are a multitude of other things you can do with menus, but it would be advisable to read about all of that online or from here: Wordpress menus.
Click for a 'Show Me How' Walkthrough.
Edit the About Us page

Click the Edit with Elementor link at the top of the screen. Click on any item that you want to change then click the blue square that will show to the right of the item. Then on the left a panel will show where you can edit the text or image depending on what you clicked on.
Click the Update button on the bottom left to save changes. To exit or view the page, click the three lines at the top to the left of the Elementor logo and a menu will show, click View Page to exit and view the page.
Click for a 'Show Me How' Walkthrough.
Edit the Buyers page

To edit the Buyers page, click the Beaver Builder link at the top of the page. After it loads, click on any item you want to edit then click save on the item. When finished click the Done button then Publish on the upper right.
Click for a 'Show Me How' Walkthrough.
Edit the Sellers page
To edit the Sellers page, click the Beaver Builder link at the top of the page. After it loads, click on any item you want to edit then click save on the item. When finished click the Done button then Publish on the upper right.
Click for a 'Show Me How' Walkthrough.
Edit the Contact Us page
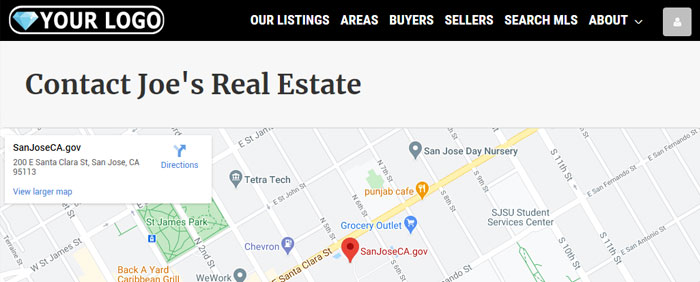
To edit the Contact Us page, click the Beaver Builder link at the top of the page. After it loads, click on any item you want to edit then click save on the item. When finished click the Done button then Publish on the upper right.
Click for a 'Show Me How' Walkthrough.
Landing Pages (Walkthrough is below)
We offer many different options for Landing pages. Here are some details.

Real Estate Landing Pages
The 1st step to create your own Landing page is to create a new page
-
- Go to pages and click pages, Add a New page
The pages link can be found at yoursite.com/wp-admin (add wp-admin to the end) - Give the page a name
- Change the Template on the right under page attributes to 'Elementor Full Width'
- Click Publish
- Click the Beaver Builder tab
- Click the + sign in Beaver Builder on the top right
- Click Templates
- Click the dropdown menu and there are many template options there
(Our custom templates are under 'Saved Templates') - Choose a Template
- Make any changes you would like and then click the Publish button on the top right
- Go to pages and click pages, Add a New page
Note: After publishing you sometimes have to clear your browser cache. If the page does not look right after reloading the page, then clear your browser cache or clear it then close the browser then reopen.
Note about forms:
Our custom Landing pages have forms already imbedded that will send the leads to your Open House Wizard account. If you are creating a Landing Page that does not already have a form then to add a form that will work the correct way:
-
- Add a Text module in Beaver Builder to the page
- In the Text module past this code: (After copying, remove the 'space' before the word 'gravityform')
[ gravityform id="22" title="false" description="false" ajax="true"]
| Existing pages that can be used as Landing Pages | Our Prebuilt Landing pages | Create your own from our Custom Templates |
Properties or Listings:
The Property and Agent Bio pages will automatically send any Visitor inquiries directly to you. **For Team or Broker sites Individual Agents can still use these pages as Landing pages and receive any inquiries that are made. To do this: Add: ?agentid=your_agent_id to the end of the Landing page url. More info below. |
|
We have included 8 custom Landing page templates that you can use as starting points to easily create your own landing pages.
Besides those templates there are many many more in our Templates dropdown in Beaver Builder. Once in Beaver Builder choose the + icon on the top right, then choose Templates, then Saved templates to see our custom templates. Checkout the walkthrough video below for full instructions on how to get started with our custom templates. Here are the 8 custom template names:
|
**MORE INFORMATION ON LANDING PAGES FOR TEAMS & BROKERSDid you know that any page on your website can be used as a personal Landing Page by any agent that is a part of the Team or Broker website? It just involves adding your Agent ID and/or our full page code to the end of pretty much any url or page address on the site. **Your Agent ID can be found on the Open House Wizard Account & Billing page under Websites. |
||
| Add your Agent ID to a Page to Receive any Inquiries from that page | Remove the Header (top menu bar) and the Footer (Lower info bar at the bottom of the page) to make any page a true Landing Page. | Combine both methods to have a Landing page that has not Header or Footer and has your Agent ID for any Inquiries. |
| Add: ?agentid=your_agent_id to the end of any pages url.
An example for the Buyers page: You can find your Agent ID on the Websites page under Open House Wizard's Account & Billing page. |
To make any page such as a Property or Listing page a perfect landing page with no menu bar at the top and no info bar at the bottom, just add: ?makelp to the of the page's url or address.
An example is: |
To Add your Agent ID AND remove the top and bottom bars, just add this to any url or page address: ?agentid=your_agent_id&makelp An example would look like this: ll2c.com/buyers/?agentid=20211&makelpNote the '&' is used to combine the agent id with makelp. |
Click for the Landing Pages walkthrough.